Table Of Content

© 2024 Advance Local Media LLC. All rights reserved (About Us). The material on this site may not be reproduced, distributed, transmitted, cached or otherwise used, except with the prior written permission of Advance Local. If you purchase a product or register for an account through a link on our site, we may receive compensation. Cricut has long been the most sought-after name for crafters who love to personalize their creations. And now, thanks to a massive sale at Walmart, you can get everything you need to make your own one-of-a-kind pieces at less than half the price.
Beyond the Basics: Infusible Ink™
Now there’s a number of ways that you can join things and they’re easy to confuse with one another, so let’s talk about them. When you’re ready to start a project, scroll back up to the first screen I showed you and click on the big PLUS SIGN icon called “New Project” in the “My Projects” row. Alternately, you can click on the green “New Project” button in the upper right corner of the window. Add depth to your card and paper projects with Kate's tips on making paper flowers. There's so much you can do with iron-on (HTV)! We've broken down the basics with step-by-step tutorials for beginner and intermediate heat transfer projects, including tips and tricks for working with this material.
Materials
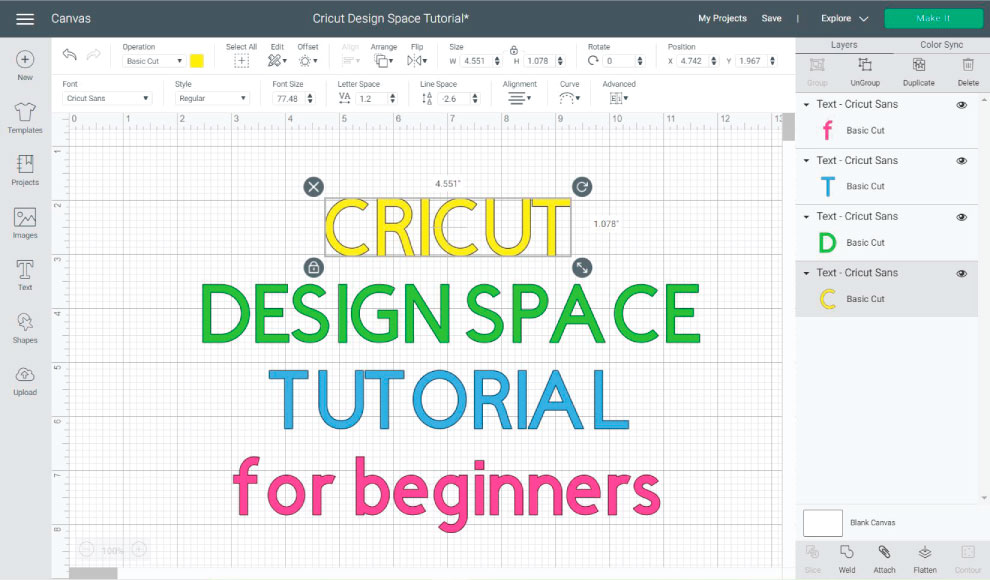
Walmart just slashed the price of Cricut Explore Air 2 Machine - AL.com
Walmart just slashed the price of Cricut Explore Air 2 Machine.
Posted: Tue, 23 Apr 2024 14:41:00 GMT [source]
It’s really nice to have it all just like spelled out for you. Thank you so much for joining me for your Cricut Kickoff. I hope this has helped you get on the path to success in making all of those awesome things that you can imagine and wanna fill your home with and give to your family and friends. And if you do, please share photos in my group.
Learning Library
And let’s say I just really wanted the flower to be more like this and then we can group them again right here, or we can attach them. And then if we attach them, they’ll stay together on the canvas. Now, since they’re two layers, it’s really not. They’re gonna cut on different colors of paper, but sometimes it’s still useful to do that.
Make it: Cutaway cards with the Cricut® Card Mat 2x2
By the way, there’s two layers here, so I can select each layer and I can have a purple flower and I can make this deer, oh, I don’t know. So we have all of the options that we wanted to do. And now these two, they are grouped, and you can always tell, because the ungroup becomes an option. And if we needed to ungroup them, we can just click ungroup and then we can move these things down.
This recorded Zoom session is for beginner and intermediate makers who have the fundamentals down but want to make a more complex vinyl decal project with expert guidance. Start HERE if you're a beginner, before you view any other Workshops. Watch a Cricut teacher make a single-layer sticker in this recorded crafting session.
Now, you may notice that you don’t see an SVG file. So on some Windows computers, they’re called Chrome HTML or Edge HTML, because they’re pushing the Microsoft Edge browser in Windows, I think. I actually now will put the SVG in the file name to help you find it. The actual video that this came from, this is in a series called jennifermaker.com/svgs. You can choose where you want it to go by clicking the browse button. And so it’s a good idea to pay attention to where it’s going so you don’t lose it.
So when you download the file, when you click this link right here, it downloads the file so I’m gonna do that for you right now. And that’s what it did, it went there. So it just went right to my computer and let’s see, and we can go to my computer where it actually downloaded, but I just need to close one of these windows.
Download ArchiFacile free for PC - CCM
Download ArchiFacile free for PC.
Posted: Mon, 03 Oct 2022 07:00:00 GMT [source]
I love my machine and app.
And my Mac actually unzips it for me. I have it set, Chrome, actually, Google Chrome, which is what I’m using, I have it set to unzip all my files. I don’t ever have to worry about it, and here is the file itself that we will be using. Now, I think more of you use a Windows computer than a Mac computer. Here we are in the library, and this is is a video of me on my Windows computer.
Instead, I always click on browse and I go find the file I downloaded. That’s why it’s important to remember where it went and if you can’t find it, dollars to donuts, it’s in your downloads folder and both Mac and Windows have a downloads folder. All right, so here it is right here. So we have downloaded the file and we need to go to our finder.
I would like to make my own design and so I’m going to duplicate this heart. Let’s see, so one way is to right click on your mouse, if you’re using a mouse and you get the contextual menu. It lets you do a lot of things right from here. If they’re grayed out like these are, that means that that’s not option right now because of the image that you’ve chosen.
We need, and also it’s like, not even like centered or anything. It doesn’t look like a certificate to me, so we need to do a few things here. Now don’t go double clicking this file. It’ll just be confusing and it won’t lead you. It won’t like open up magically in Design Space, which would be wonderful, but it doesn’t do that.
But right now, I can cut it, by the way, cut means not to cut it on your machine. It means to remove it from your canvas, but keep it in your copy buffer, just like on, you know, your word processor. I can copy it, I can duplicate it, and I can delete it. So I’m gonna just click that and I get two hearts.
So the plus makes it bigger, and this is not the actual item getting bigger, just your view of it. And the minus will make the view of your design smaller, so if you need to get in there and see fine details. All right, so here’s our heart. When we click on it, that means that we’re selecting it. So if I click away, you’ll see that that box that was around it disappears, and when we click on it, the box comes back and it goes all around the edges of the image.
It’s just a couple of minutes. All right, so it says that it’s all done and we can unload our material. You get this little box at the top and you can just dismiss it up here. And unloading, again, is the flashing arrow that’s up and down here. This one’ll be harder to see, but I’ll try to show it to you anyways.


No comments:
Post a Comment